
1
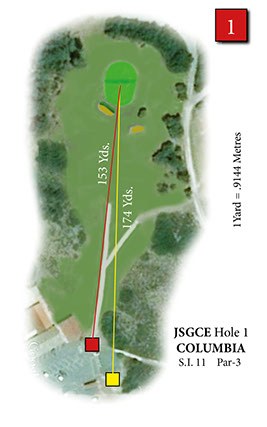
Columbia
- Men's tees
- 174 yds
- Ladies' tees
- 153 yds
A gentle start to the front nine. What you see is what you get with a bunker to the left and a mound to the right protecting the front of the green.
All eighteen holes, hole by hole — with the club's own notes on how to play each one.
Holes
18
Men's total
5,794 yds
Ladies' total
5,148 yds
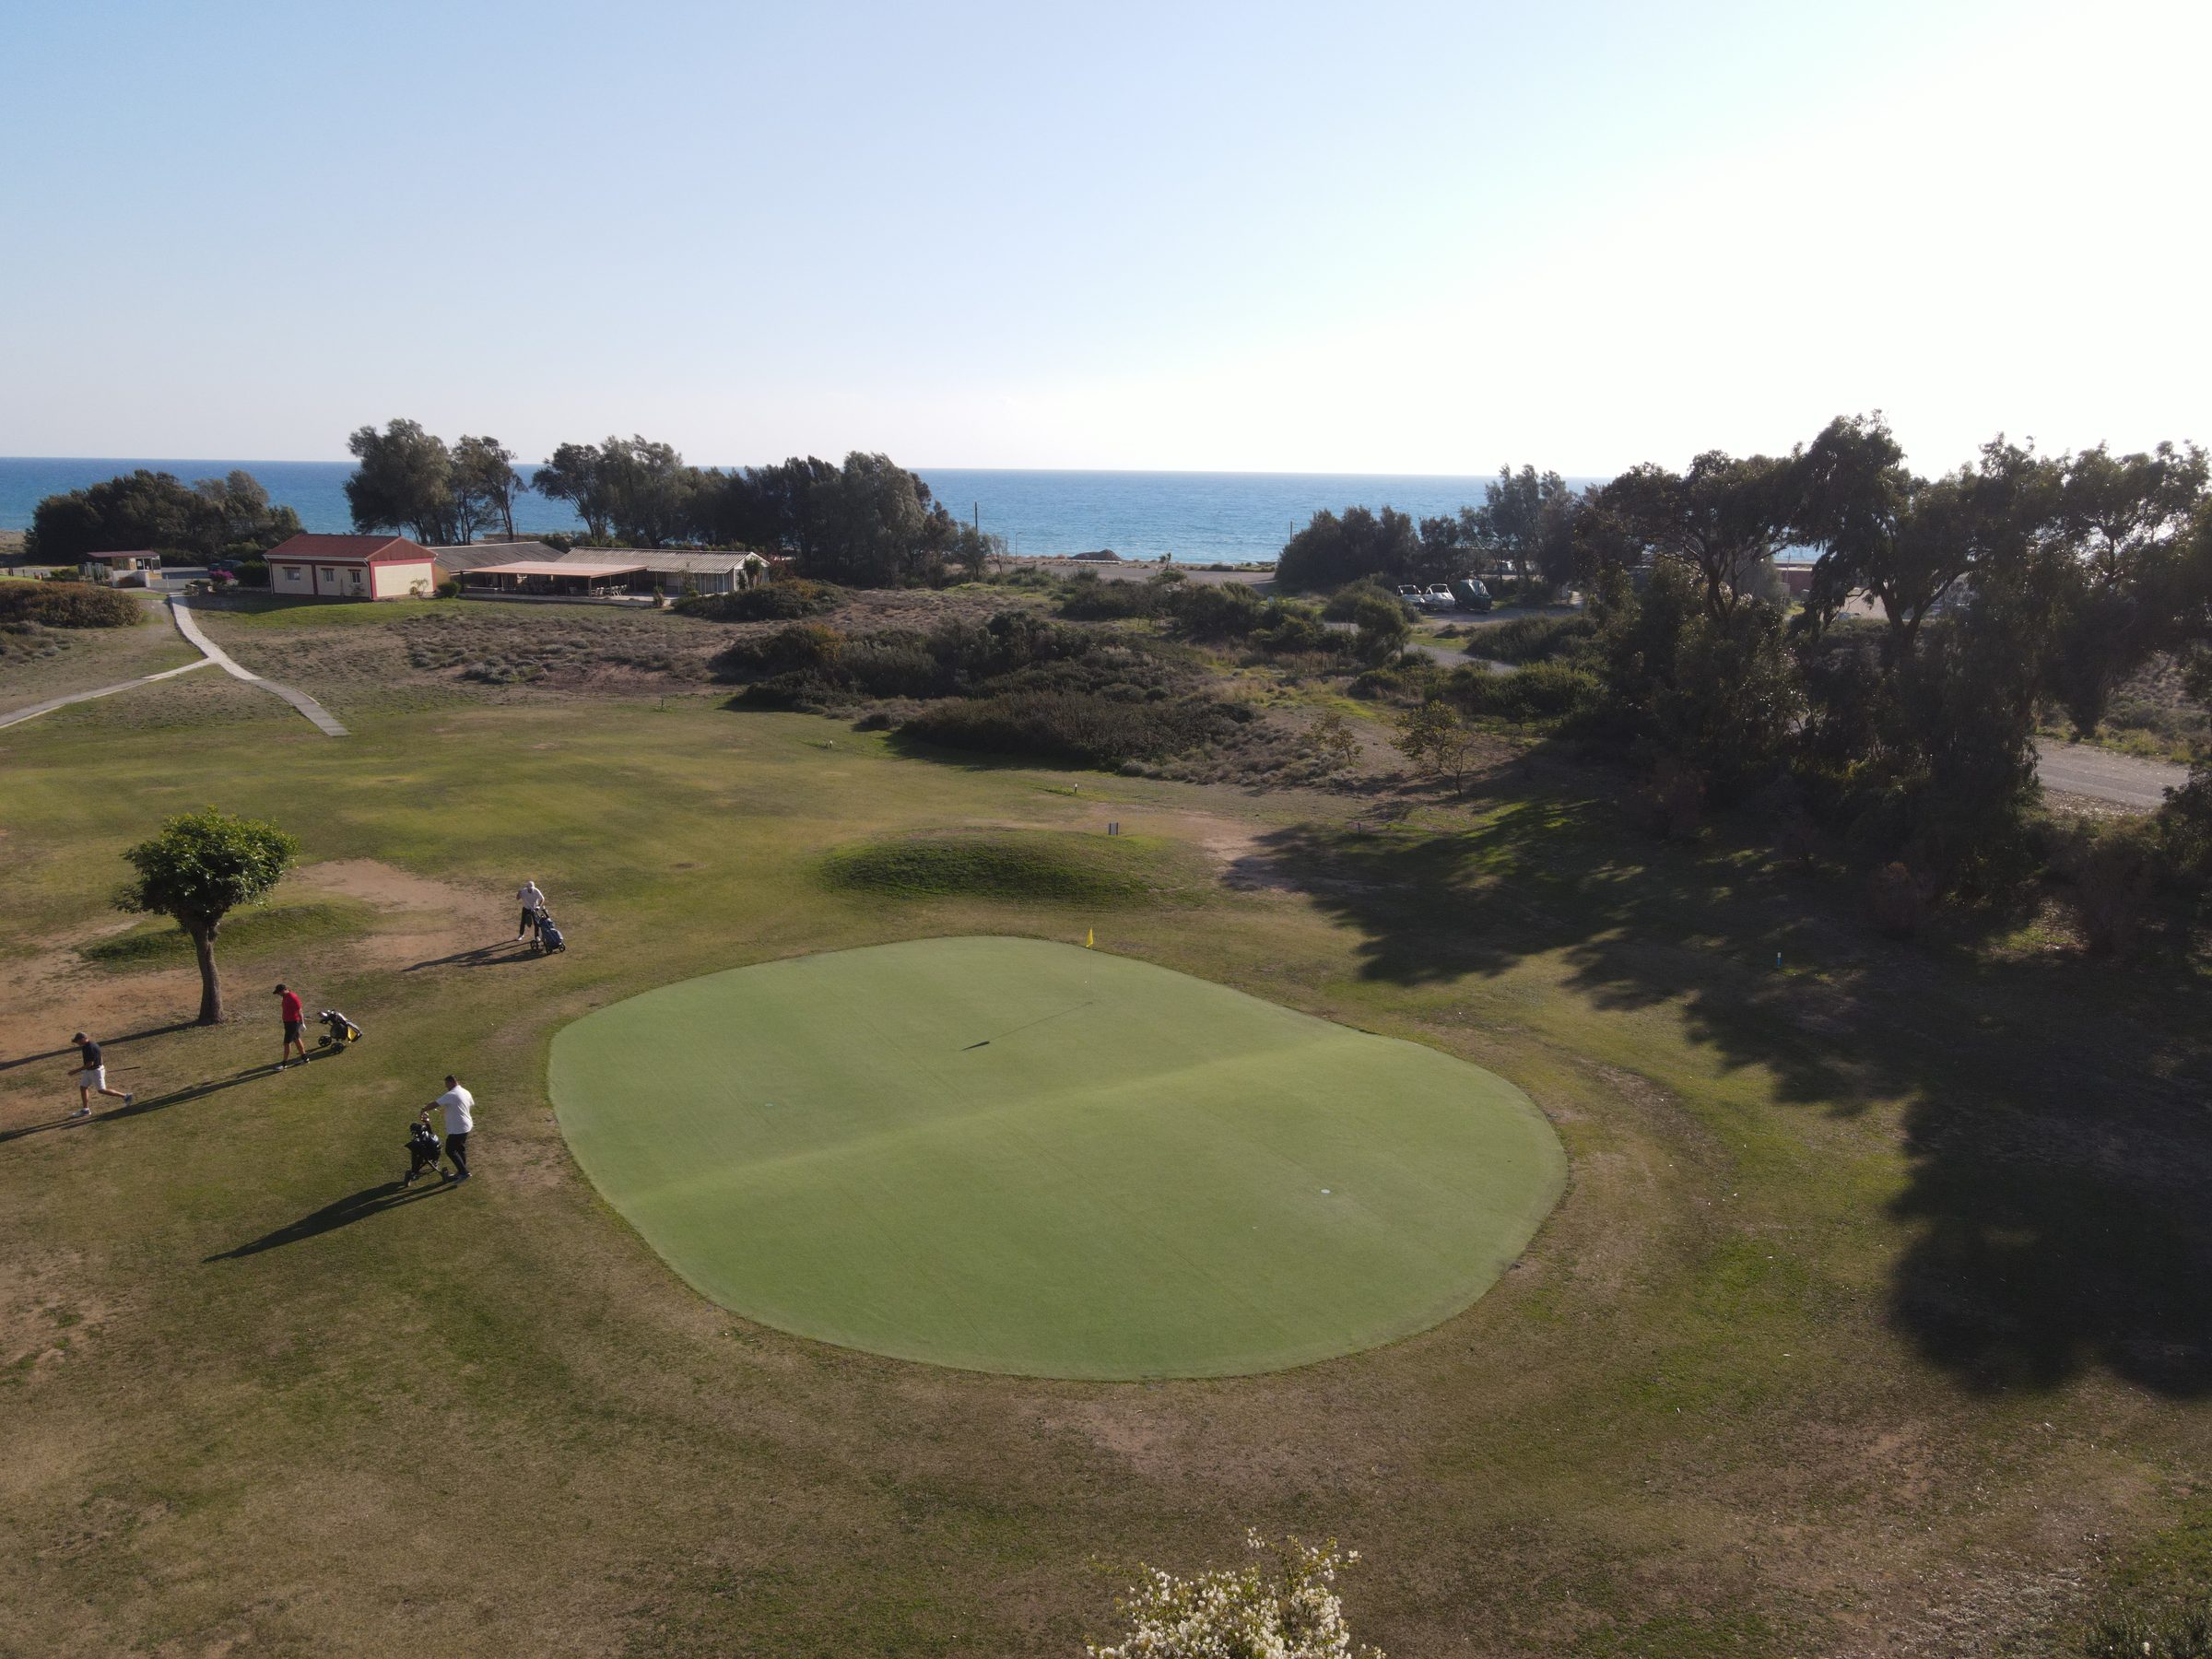
A gentle start to the front nine. What you see is what you get with a bunker to the left and a mound to the right protecting the front of the green.
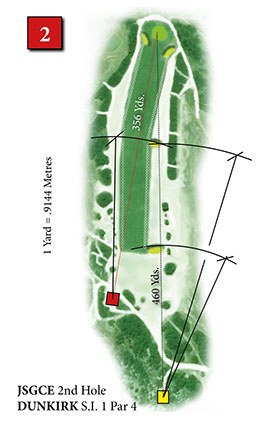
The recently reseeded fairway makes this very worthy as the most difficult par-4 hole. The first mound on the right is easily reachable from the tee box, however, the second one is reserved for the long hitters.
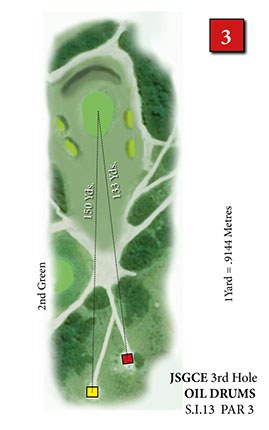
A par-3 that can be a wedge or a 6 iron depending on the erratic wind direction. It has two bunkers to the left and a low banking to the rear.
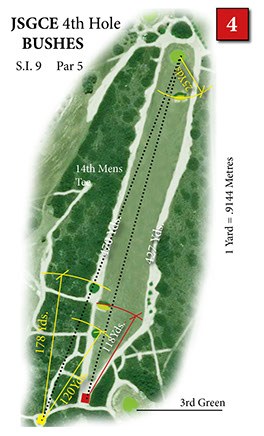
The 4th is a fairly straightforward hole from the Ladies tee box, but from the Men's tee box, it is a slight dogleg left with a forced carry over bushes. The further left you aim the greater the carry and the greater the risk. The ideal line is just left of the right hand tree.
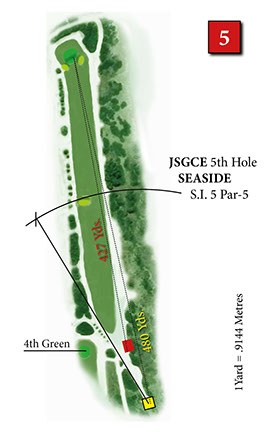
The Seaside tee shot needs to be a little right of the centre line as the bushes and a bunker down the left side await. This year has seen some bushes cleared all along the right side which now gives some room for the fading shot that drifts in that direction.
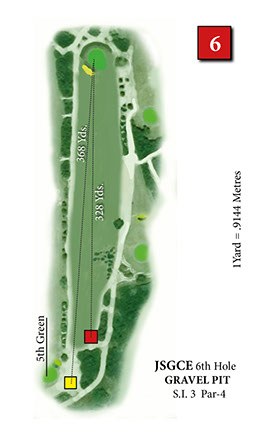
Gravel Pit is a deceptively tough hole off the tee and needs a good shot in from the right as the left side of the green is protected by a large bunker. Not much room for error all down the left side so the ideal line off the tee is towards the right side of the fairway.
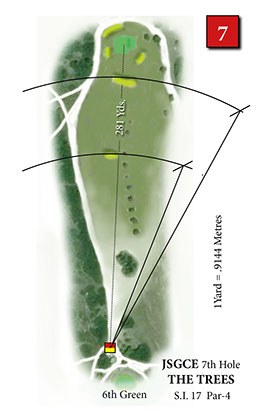
Recently having undergone extensive reseeding work around the approach area the 7th is deceptive in it's rating. Plenty to go wrong here if you miss the fairway on the left. NB when playing in from the 8th fairway, markers that define the actual fairway start may not allow the use of a mat if your ball passes the start point. That is because you are not on any fairway.
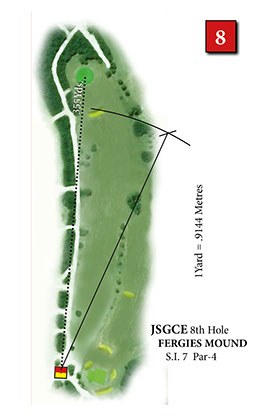
A favourite amongst the long hitters, this is a great hole with plenty of room to go for a long one. A front side bunker should not be any problem unless you are short off the tee.
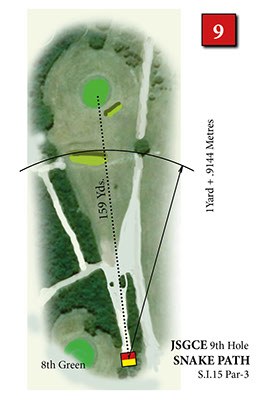
Snake Path is a tricky par-3 that is again very much affected by the wind conditions. A fading left to right shot will take out the right greenside bunker. Stopping on the green is usually the difficult part.
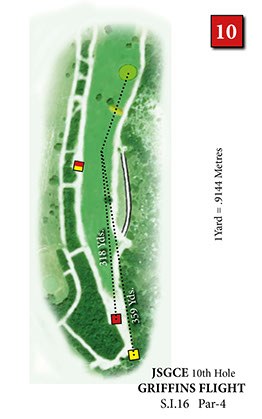
A tough Par 4 which Dog-Legs right. Bushes all the way down on the left await. Too Far right on the tiger line and you could be searching in the rocks to find that ball.
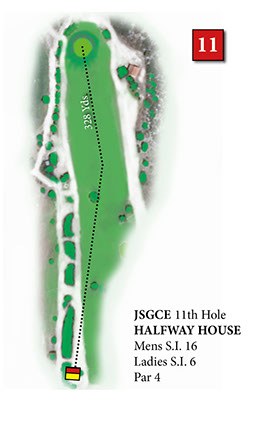
Halfway House is a relatively short par 4 that favours the long hitters. The raised green presents a low banking to the rear which can pose problems if your approach is long.
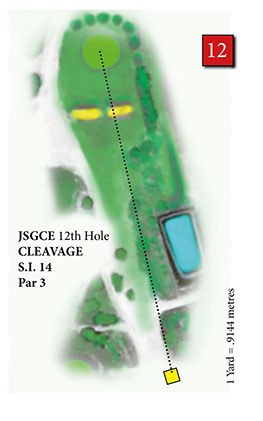
Cleavage is a tricky par 3. Long and left will end up in big trouble and too short could find one of those cleavage bunkers.
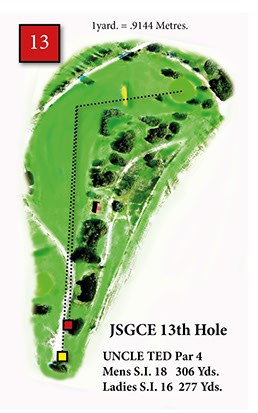
Don't be fooled by the stroke index! This can be a real risk and reward par 4. A good drive over the trees offers the opportunity to find the green, but can you really carry the ball 230 yards and clear those bushes?
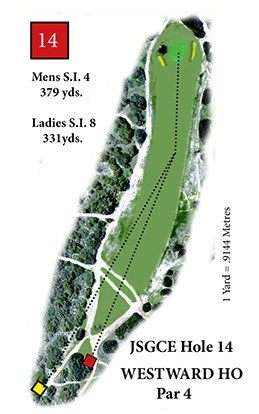
A challenging Par 4 that dog-legs slightly left. A good tee shot can set you up to attack the green for a birdie chance but beware the bunker on the left of the approach. It always plays a bit longer than it looks into the wind, but beware the bushes long on downwind shots.
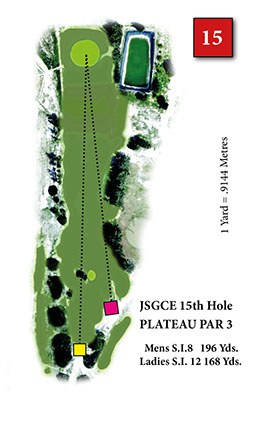
A deceptively long par 3 due to the uphill nature of the fairway. Beware the reservoir on the right. This hole can play very short downwind.
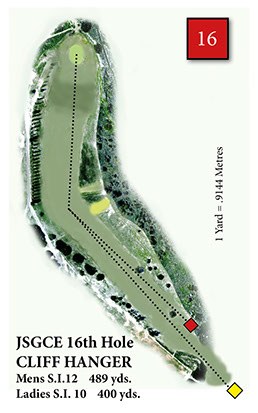
A Par 5 dog-leg right that needs a good long drive for an opportunity to get there in two. Beware - the uphill approach takes your ball to the left and down the hill.
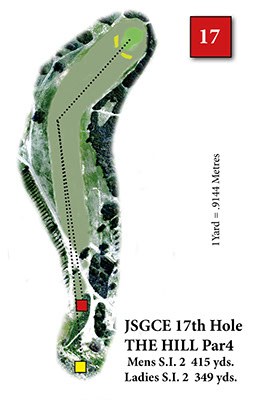
A tough par 4 for a tired golfer. A high marker post shows the way in for those who come up short, but beware of the high bushes if you take that chance.
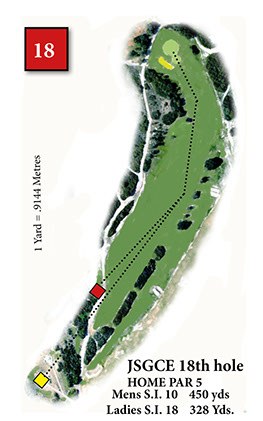
A fairly straightforward hole. Two straight shots are needed so that you can see the green. Play it safe or gamble and go over the corner to a blind green (if you want reach in 2) . Either way you will soon be heading for a well deserved beverage in the clubhouse.
Par and stroke index for each hole are printed on the hole diagrams above.